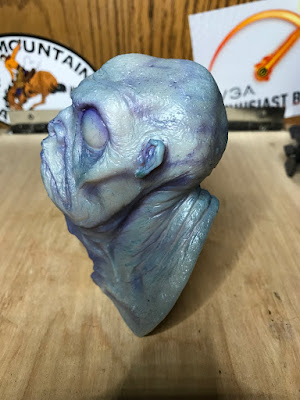
My son Zach and I took a painting class at Wonderfest this year and I have to say that it was great.
The class was put on by
Amazing Figure Modeler (The Devil class) and ended up being taught by not 2, but 4 awesome teachers. Due to a lack of interest, the Zombie class was cancelled and we had Steve Riojas, Fred DiSanto, Dave Prosser, and Thad Rhodes as teachers (The other classes loss was our gain).
 |
| The bust ready to paint |
1) The bust - A Casey Love sculpt cast by Whitworth Studios, cleaned and primed, ready for us to go. We were able to later find a few areas that will need cleaned up (mold lines) but overall it looked really clean. This is an awesome sculpt that both Zach and I were excited to paint.
2) The supplies -
Reaper Master Series Paints, palette, Reaper Pro Paint brushes, pastels, sponge, medicine cups, all in a handy little box. Everything we wanted and / or needed was provided with this class. They thought of everything, and even delivered coffee if desired.
3) The instructors - I know having 4 great painters for 1 class really isn't normal but let me tell you, them rotating topics and the others walking around giving tips / hints was awesome. It really kept the class moving and put the instruction over the top.
4) Now for the painting
 |
| Base Coat of paint and secondary color applied |
a) First we brushed on the base coat and then stippled on a secondary darker color. The stippling gave the look of skin texture on the piece. (Zach's is on the left, mine is on the right)
 |
| Lighter color stippled on |
b) We then came in with a lighter color and stippled that on the areas that would be lighter.
 |
| The eyes have it |
c) We then added in the eyes. This was done using an off white for the sclera, then a pink edging for the edges of the lids. The Iris' were done using a black and then a green. Lighter green was painted on top of the darker green (slightly inside the dark) and then black for the pupils. Zach went for a neat double iris / pupil look.
 |
| Washed with black and purple |
d) We created washes with the paint and began layering a black wash down the horns of the devil with each further layer extending further down. Damp Q-Tips are useful here to make sure there isn't a hard edge at the bottom of your wash layer. I added a little purple wash to the under eye area and mouth area of my. We also added a reddish wash to the tips of the ears and nasal area.
 |
| Pastel shading started - Purple |
e) We then break out the pastels and begin some pastel shading. Beginning with a purple we shade some of the shadow areas and around the eyes and mouth.
 |
| More pastel shading |
f) A light reddish pastel is used to shade the horns as they meet the head, the ears, nose, and mouth. I also used this color to add a few age spots on my devil.
 |
| Black pastel shading done sparingly |
g) Black pastel shading is then performed on the horns down and inside of the ears and nose. This is done gently since shadows aren't normally black.
 |
| Side view after black pastels |
e) Finally we dull coated the figures (This was done between steps also a few times) and gloss the eyes (we used future floor wax but I didn't think they were quite glossy enough).
Zach and I chose not to enter our pieces in the contest the next day but there were a few people who did. The one of these that stands out the most was a 15 year old girl who entered hers and got an award and also won an airbrush and compressor from Iwata for her entry. This was her first time painting. I thought it was outstanding and cool to see.


Comments
Post a Comment