Ma.k. Model - Part 1
So I started sitting down with a friend on Mondays to paint and work on models and figures. I started off with an Andrea miniature which will be part of a scene I'm making but he and I decided to buy some Ma.k. model kits to assemble and paint. This kit was purchased from Starship Modeller
A little about the Ma.k. genera: Think about advanced weapons in WW2...well, advanced for that time. Armor suits for soldiers. Mechs that were operated bu gasoline engines. Stuff like that. I find the concept really cool because you get some neat looking pieces.
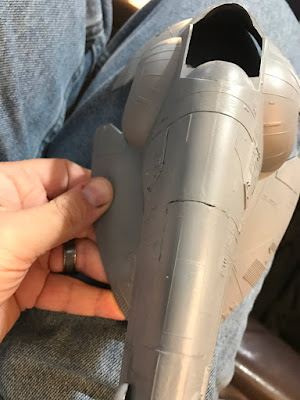
A little about the model kit and assembly: Wow...pieces and areas that move and options. This model kit was fun to build and took 4 Mondays around 3-4 hours each Monday (so 12-16 total hours for assembly). I used Plastruct Plastic Weld and found that it works very well. The instructions say to place the pieces together and then paint the glue over top of the joint, allowing it to wick into the joint. This is best done on the inside of the piece where it won't be seen but at times you have to do this on the outside. Alternatively if you are quick, you can paint on both sides of the joint and place together (this stuff dries in 30 seconds though so quick is important). As far as painting over the outside joint with the glue, just be careful not to paint over detail and be ready to sand the joint at least a day later. (This product does 'melt' the plastic forming a bond between the pieces)

This piece was primed with Duplicolor sandable primer in a dark grey color. This was not the 'primer' color of the piece though (the Germans used a red brown color for priming their armor based on research I did). After the dark grey was sprayed on, I followed up with Model Air paints German Red Brown color for the 'primer' color.


After painting on the primer color, I then decided to go with the traditional panzer grey color with the thought that I was going to whitewash a winter camouflage over the model then (I have since thought I might not go with the winter, more on that later).
The decals... I remember doing water based decals on models when I was little and they always were a pain in the rear and looked like crap. They were crooked (because they would adhere too quickly at times, or because I got tired of messing with them), cloudy, peeled off some, and had these awful edges all the way around the decal. Well, let me introduce you to my new best friend for decals. Decal Medium and Decal Set. Jack uses MicroSol and MicroSet but I couldn't find a good place to supply that brand so I decided to check the local game store and they had the Vallejo brand of these mediums (A little research online indicated that they were very similar to the MicroSol and MicroSet products).


So, after painting the panzer grey (Model Air once again) I did the decals. A few 'tips' that I ran across. Cut the decal close. Once you have it in place (Decal Medium helps the work time of shifting the decal around), wick away the water and medium and let it dry before doing anything else. The way I applied the medium was I put some medium on a brush and brushed it over the location where the decal was going to go. Normally I dropped the decal in a lid of water to soak while doing this. Tweezers proved to be a must for the decal process for big fingered me. The decal came out of the water and I used tweezers to place it on the model. The tweezer tips were used gently to nudge the decal around. I then wicked any water or medium off of the piece using the corner of a paper towel and moved along to the next decal.
After the decals were dry, I took a brush and put decal set directly onto the brush. This was brushed over the decal and allowed to dry. Do not try to move the decal once the decal set has been applied. These products thin the decal out as well as set it in place (making the edge so it can't be seen) so any messing with the decal after this can ruin the decal.
What I found was that sometimes the decal medium would dry a little cloudy around the decal. I tried using more medium on a brush, water on a brush and all it did was make the cloudy ring bigger. What I figured out though was that when I sprayed Matte Medium over the piece, these cloudy areas disappeared completely. I can only assume that I used too much medium or there was too much water in that spot, or I didn't manage to shake the medium enough that time.
My next post will be weathering this model, adding rust and some streaking effects to it.
A little about the Ma.k. genera: Think about advanced weapons in WW2...well, advanced for that time. Armor suits for soldiers. Mechs that were operated bu gasoline engines. Stuff like that. I find the concept really cool because you get some neat looking pieces.
A little about the model kit and assembly: Wow...pieces and areas that move and options. This model kit was fun to build and took 4 Mondays around 3-4 hours each Monday (so 12-16 total hours for assembly). I used Plastruct Plastic Weld and found that it works very well. The instructions say to place the pieces together and then paint the glue over top of the joint, allowing it to wick into the joint. This is best done on the inside of the piece where it won't be seen but at times you have to do this on the outside. Alternatively if you are quick, you can paint on both sides of the joint and place together (this stuff dries in 30 seconds though so quick is important). As far as painting over the outside joint with the glue, just be careful not to paint over detail and be ready to sand the joint at least a day later. (This product does 'melt' the plastic forming a bond between the pieces)

This piece was primed with Duplicolor sandable primer in a dark grey color. This was not the 'primer' color of the piece though (the Germans used a red brown color for priming their armor based on research I did). After the dark grey was sprayed on, I followed up with Model Air paints German Red Brown color for the 'primer' color.


After painting on the primer color, I then decided to go with the traditional panzer grey color with the thought that I was going to whitewash a winter camouflage over the model then (I have since thought I might not go with the winter, more on that later).
The decals... I remember doing water based decals on models when I was little and they always were a pain in the rear and looked like crap. They were crooked (because they would adhere too quickly at times, or because I got tired of messing with them), cloudy, peeled off some, and had these awful edges all the way around the decal. Well, let me introduce you to my new best friend for decals. Decal Medium and Decal Set. Jack uses MicroSol and MicroSet but I couldn't find a good place to supply that brand so I decided to check the local game store and they had the Vallejo brand of these mediums (A little research online indicated that they were very similar to the MicroSol and MicroSet products).


So, after painting the panzer grey (Model Air once again) I did the decals. A few 'tips' that I ran across. Cut the decal close. Once you have it in place (Decal Medium helps the work time of shifting the decal around), wick away the water and medium and let it dry before doing anything else. The way I applied the medium was I put some medium on a brush and brushed it over the location where the decal was going to go. Normally I dropped the decal in a lid of water to soak while doing this. Tweezers proved to be a must for the decal process for big fingered me. The decal came out of the water and I used tweezers to place it on the model. The tweezer tips were used gently to nudge the decal around. I then wicked any water or medium off of the piece using the corner of a paper towel and moved along to the next decal.
After the decals were dry, I took a brush and put decal set directly onto the brush. This was brushed over the decal and allowed to dry. Do not try to move the decal once the decal set has been applied. These products thin the decal out as well as set it in place (making the edge so it can't be seen) so any messing with the decal after this can ruin the decal.
What I found was that sometimes the decal medium would dry a little cloudy around the decal. I tried using more medium on a brush, water on a brush and all it did was make the cloudy ring bigger. What I figured out though was that when I sprayed Matte Medium over the piece, these cloudy areas disappeared completely. I can only assume that I used too much medium or there was too much water in that spot, or I didn't manage to shake the medium enough that time.
My next post will be weathering this model, adding rust and some streaking effects to it.

Comments
Post a Comment